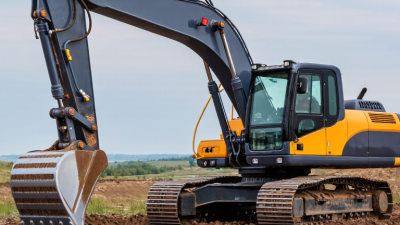
7 Tips for Choosing the Right Excavator Machine
Choosing the right excavator machine can shape a project’s safety, productivity, and operating costs. The wrong choice may struggle in compact soil, waste fuel, or damage finished surfaces. A careful decision begins with the worksite, not the sales brochure.
This guide examines seven practical tips for selecting suitable equipment. It considers machine size, digging depth, lifting capacity, attachment compatibility, ground conditions, operator comfort, and after-sales support. A compact excavator may fit a narrow backyard, while a larger crawler model can handle deeper trenches and heavier loads. Measure access points carefully. A few centimeters can change everything.
Experienced contractors also check hydraulic performance, service intervals, track width, and transport requirements. Ask for verified specifications, maintenance records, and a realistic fuel estimate. Local dealer support matters when a hydraulic hose fails during a busy shift. It is easy to overlook that detail.
No checklist is perfect. Weather changes. Soil surprises people. A machine that performs well on dry clay may move poorly across wet ground. Operators should inspect visibility, control response, emergency features, and daily inspection points before work begins. A short demonstration often reveals more than polished advertising. Test the machine.
Reliable selection balances immediate performance with long-term ownership. Purchase price alone rarely tells the full story. Rental options, replacement parts, downtime, and resale value deserve attention. These seven tips provide a practical framework, though final decisions should reflect qualified operator feedback, site assessments, and manufacturer guidance. Mistakes can still happen. Careful preparation reduces their impact.
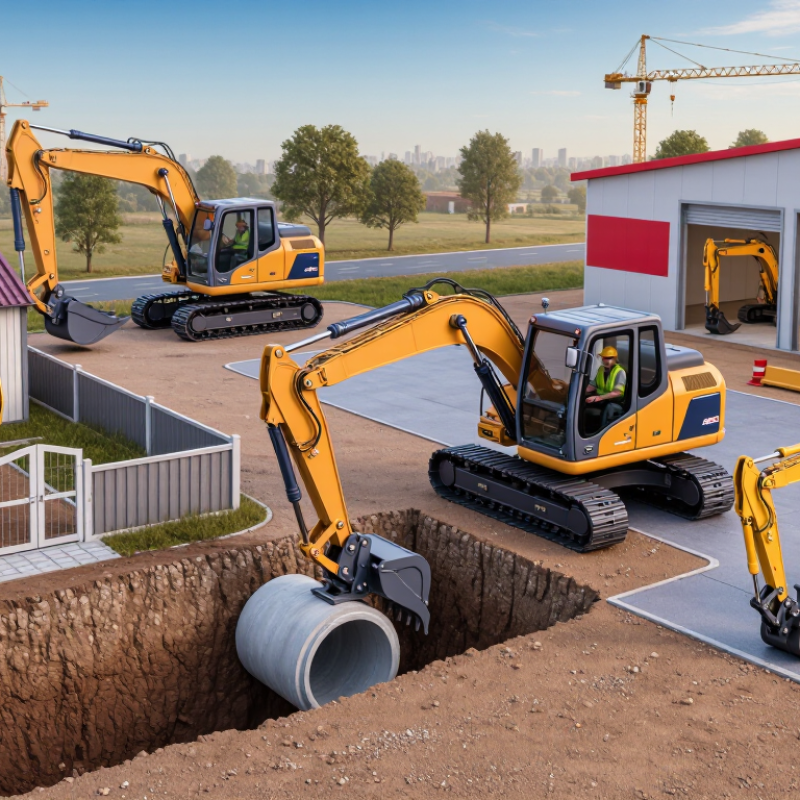
Define the Excavator’s Intended Work and Operating Conditions
Before choosing an excavator, define the actual work in clear terms: trenching, grading, loading, demolition, or drainage repair. Each task requires different digging depth, reach, lifting capacity, and attachment power. A machine that digs efficiently may perform poorly during fine grading. Measure the required trench depth and working radius before comparing specifications. Small details matter.
Then study the operating conditions. Identify the soil type, available space, ground slope, weather, and daily working hours. Soft ground may require lower ground pressure and wider tracks. Narrow access may demand a compact body and reduced tail swing. Measure gates, road widths, and overhead obstacles at the jobsite. Do not rely on estimates. A few centimeters can stop delivery.
Experience also improves the decision. I once focused too heavily on lifting capacity and overlooked transport limits. The machine worked well, but moving it between sites became expensive and slow. Review the operating manual, rated loads, hydraulic flow, fuel use, and maintenance access. Ask experienced operators how the controls feel after a long shift. Their feedback may reveal vibration, poor visibility, or awkward attachment changes. Specifications are useful, but field conditions often expose their weaknesses.
Match Machine Size and Excavating Capacity to the Project
7 Tips for Choosing the Right Excavator Machine
Match Machine Size and Excavating Capacity to the Project
Choosing an excavator starts with the worksite, not the machine brochure. Measure the trench depth, working radius, soil type, and available space. A compact excavator suits narrow yards and light utility work. Larger machines provide greater digging force and lifting stability. Small is not weak. It becomes inefficient when the bucket stays too small for the workload.
Check the machine’s operating weight, engine output, hydraulic flow, and rated digging depth. These figures show whether it can handle dense clay, broken ground, or repeated loading cycles. Match the bucket capacity to the material being removed. An oversized bucket may reduce cycle time but overload the hydraulic system. An undersized bucket wastes fuel and labor. Measure twice.
Site access also matters. Confirm doorway widths, ground bearing strength, transport limits, and overhead clearance. A powerful excavator is useless if it cannot reach the excavation safely. Experienced operators also compare maximum reach with practical reach under load. The longest specification may not reflect stable daily performance. That assumption can fail.
Consider attachment demands before making a final choice. Hydraulic breakers, augers, and grapples require suitable flow and pressure. Ask for maintenance records when buying used equipment. Inspect pins, bushings, tracks, hydraulic hoses, and signs of leakage. I would also allow extra capacity for unexpected ground conditions. Projects rarely follow the original estimate exactly.
Evaluate Attachments, Versatility, and Hydraulic Performance
Choosing the right excavator starts with the work, not the machine’s appearance. List the required attachments, including buckets, breakers, augers, grapples, or compactors. Each attachment needs suitable hydraulic flow and pressure. A mismatch can cause slow cycles, overheating, or premature wear.
Check the coupler carefully. It should lock securely, connect quickly, and fit the attachments used on your site. Variable auxiliary flow is valuable because a breaker and an auger rarely need identical settings. Proportional controls also improve precision around pipes, foundations, and finished surfaces. Small control differences matter.
Versatility depends on more than attachment quantity. Examine lifting capacity, tail swing, reach, stability, and available control modes. A machine that changes tools quickly may reduce idle time during a busy shift. However, extra capability can increase purchase and maintenance costs. I once focused too heavily on maximum hydraulic power and overlooked operator comfort. That decision made long trenching days unnecessarily tiring.
Review hydraulic performance under realistic conditions, not only brochure figures. Ask for flow rates at working pressure and observe cycle speed with a loaded bucket. Inspect hoses, fittings, cylinders, and the hydraulic tank for leaks or unusual heat. Clean oil and scheduled filter changes strongly affect reliability. During a demonstration, note whether functions remain smooth when travel and attachment movements operate together. Hesitation may reveal limited hydraulic capacity or poor control calibration.
| Tip | Evaluation Dimension | Practical Data or Benchmark | Why It Matters | Recommended Check |
|---|---|---|---|---|
| 1 | Match the Excavator Size to the Job |
Compact: below 6,000 kg Medium: 6,000–25,000 kg Large: above 25,000 kg |
Operating weight affects transport requirements, stability, lifting capability, and access to confined sites. | Confirm that the machine can enter the work area, meet ground-pressure limits, and handle the required digging depth. |
| 2 | Evaluate Attachment Compatibility | Common attachments include buckets, hydraulic breakers, augers, grapples, thumbs, shears, and grading blades. | The right attachment can improve productivity and allow one excavator to perform excavation, demolition, drilling, material handling, and grading work. | Check attachment weight, pin diameter, coupler type, hydraulic requirements, and the manufacturer's rated lifting limits. |
| 3 | Check Hydraulic Flow and Pressure | Typical auxiliary hydraulic flow ranges are approximately 40–150 L/min for many compact and medium excavators. System pressure commonly falls around 200–350 bar, depending on machine class and circuit. | Hydraulic flow determines attachment speed, while pressure influences breakout force and the ability to operate demanding tools. | Compare the attachment's required flow and pressure with the excavator's auxiliary circuit. Avoid exceeding the attachment's rated limits. |
| 4 | Assess Hydraulic Control and Efficiency | Look for load-sensing hydraulics, proportional auxiliary controls, adjustable flow settings, and selectable work modes. | Smooth control improves precision, reduces unnecessary heat generation, and helps match hydraulic output to the task. | Test low-speed attachment control, simultaneous boom and arm movement, response time, and ease of adjusting auxiliary flow from the cab. |
| 5 | Verify Digging and Lifting Performance | Compare maximum digging depth, bucket breakout force, arm crowd force, lift capacity, and maximum reach. Rated lift capacity changes with radius, boom position, and ground conditions. | A machine may have adequate engine power but still be unsuitable if it lacks sufficient reach, breakout force, or lifting stability. | Use the official lift chart for the exact configuration and verify performance at the working radius and height required on site. |
| 6 | Prioritize Versatility and Site Adaptability | Useful features include multiple attachment presets, quick couplers, a two-way auxiliary circuit, adjustable undercarriage width, a dozer blade, and a zero- or reduced-tail-swing design. | Greater adaptability reduces machine changes, supports more applications, and helps operators work safely in restricted spaces. | List the tasks the excavator must perform during a typical year and confirm that the required attachments and control functions are supported. |
| 7 | Consider Operating Cost, Safety, and Serviceability | Review fuel consumption, maintenance intervals, hydraulic filter access, daily inspection points, visibility, emergency controls, and operator protection systems. | Total ownership cost depends on fuel, downtime, maintenance labor, attachment wear, and safe operating performance—not only the purchase price. | Request service schedules, fluid capacities, inspection procedures, noise data, visibility information, and documented safety-system functions before purchase. |
Data ranges are general industry reference values. Actual performance varies according to excavator class, configuration, attachment, operating conditions, and manufacturer-rated specifications.
Compare Fuel Efficiency, Maintenance Needs, and Operator Comfort
7 Tips for Choosing the Right Excavator Machine
When comparing excavators, fuel efficiency should be measured at your actual jobsite. Check fuel use during digging, lifting, traveling, and idle periods. A machine with a low hourly rate may still waste fuel through slow hydraulics or excessive idling. Ask for operating data, not only brochure figures. Small differences become expensive across hundreds of working hours.
Maintenance needs deserve equal attention. Inspect access to filters, grease points, fluid tanks, and inspection panels. Easy access can shorten service time and reduce missed checks. Look for clear service intervals and reliable warning systems. Dusty sites demand frequent cleaning, even when the manual suggests longer intervals. This is where theory often meets reality. No checklist catches every problem.
Operator comfort directly affects productivity and safety. Sit in the cab for a full evaluation, if possible. Check seat adjustment, vibration, visibility, control response, noise, and display readability. Controls should feel natural after several hours, not only during a brief demonstration. An uncomfortable operator may slow down, make more errors, or take extra breaks. Fuel savings can disappear quickly. Compare all three costs together: fuel, maintenance labor, and operator fatigue. A cheaper machine is not always the cheaper machine.
7 Tips for Choosing the Right Excavator Machine
Compare fuel efficiency, maintenance needs, and operator comfort across common excavator size classes.
Larger excavators deliver greater digging capacity but typically consume more fuel and require more planned maintenance. Compact and mid-size machines may offer lower operating costs, while comfort features generally improve with machine size. Values represent typical industry operating benchmarks; actual results vary by workload, soil conditions, attachments, and maintenance practices.
Assess Total Cost, Safety Features, and Manufacturer Support
Choosing the Right Excavator Machine
Tip 1: Calculate the total cost, not only the purchase price. Include fuel, transport, scheduled servicing, attachments, insurance, and operator training. A low-cost machine may become expensive after several seasons. Tip 2: Compare fuel consumption during real digging work. Ask for service records and test the excavator under a similar load. Laboratory figures can feel optimistic.
Tip 3: Inspect safety features closely. Look for clear visibility, stable steps, emergency stops, rollover protection, alarms, and reliable hydraulic controls. Tip 4: Check whether the cab reduces noise and vibration. Operators make fewer mistakes when they can see clearly and remain comfortable. Tip 5: Confirm that maintenance points are easy to reach. Small design details can save hours beside a muddy trench. I once underestimated access time. That was costly.
Tip 6: Assess manufacturer support before signing anything. Reliable technical advice, available parts, clear warranty terms, and trained service technicians matter during urgent repairs. Ask how quickly common components can arrive at your worksite. A beautiful brochure proves little. Speak with current users if possible.
Tip 7: Match the machine to your actual projects. Consider digging depth, lifting capacity, ground conditions, transport limits, and attachment requirements. Extra power is not always useful; it can increase fuel use and operating costs. Review the decision with an experienced operator and an independent mechanic. Their criticism may reveal weaknesses that sales discussions miss. Allow room for doubt. That is practical planning.
Related Posts
-
What Is an Excavator Machine and How Does It Work?
-
Top Heavy Construction Equipment Types You Need to Know?
-

2026 Best Excavator Rental Options for Construction Projects?
-
The Future of Construction Equipment How Technology is Shaping the Industry
-
Top 10 Excavation Equipment You Need for Your Construction Projects
-

Why Choose Construction Equipment Rental for Your Projects?