How to Choose the Best Mini Excavator for Your Needs?
Choosing the best mini excavator starts with the job, not the price tag. A machine that feels perfect in a dealer’s yard may struggle on a muddy backyard project. Before comparing models, measure the access route, working area, soil type, and expected digging depth. Check doorway width, trailer capacity, ground clearance, and available turning space. These details often decide whether a machine saves time or creates new problems.
Mini excavators differ in operating weight, tail-swing design, hydraulic flow, lift capacity, and attachment compatibility. A narrow machine may enter a garden easily, but it could offer less stability during heavy lifting. A larger model may dig deeper, yet damage soft ground or exceed transport limits. That trade-off matters. Test the controls if possible. Notice the visibility, seat position, noise, and smoothness of the boom. Small discomfort becomes expensive after several working hours.
Reliable research should combine manufacturer specifications, experienced dealer advice, and real jobsite feedback. Ask whether the quoted digging depth includes the selected arm configuration. Confirm the machine’s actual operating weight with the bucket and required equipment installed. Review maintenance access, warranty coverage, parts availability, and local service support. A rental trial can reveal weaknesses that brochures hide. No brochure replaces soil.
There is no universal “best” model. Your decision may change after one rainy week, a tighter gate, or an unexpected attachment requirement. I have seen buyers focus on horsepower while overlooking transport and operator comfort. That mistake is easy to repeat. A practical choice balances performance, safety, budget, maintenance, and future work. This guide explains how to compare those factors clearly, so your final selection reflects real conditions rather than assumptions.
Defining Your Mini Excavator Work Requirements
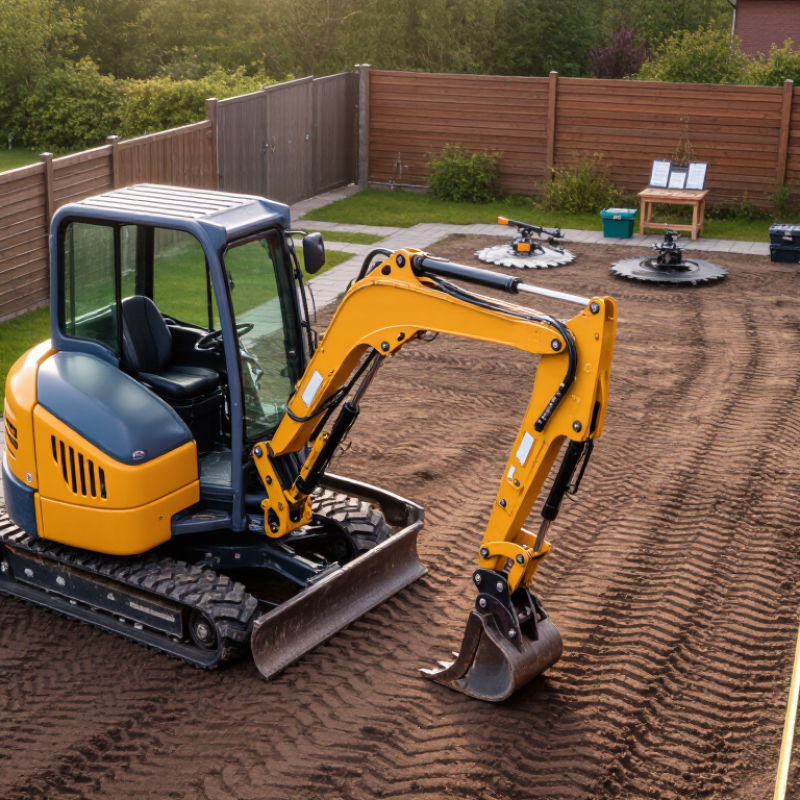
Choosing a mini excavator starts with defining the work, not comparing machine colors or advertised features. Write down the tasks, ground conditions, access limits, and expected working hours. Digging shallow trenches in a landscaped yard requires different capabilities from removing hard soil beside a foundation.
Measure the narrowest entrance before selecting the machine. Record its width, height, turning space, and surface strength. A compact excavator may fit through a gate but still damage soft paving with its tracks. Check the required digging depth, dumping height, reach, and lifting load. Keep a margin above your highest requirement. Exact limits can change with arm position and bucket size.
Attachments should match real tasks. A narrow bucket suits utility trenches, while a grading blade helps level disturbed soil. Hydraulic flow matters when using breakers, augers, or compactors. Ask for the operating manual and maintenance schedule. Inspect hydraulic hoses, pins, tracks, and the quick coupler before work begins.
Operator comfort also affects accuracy. Clear sightlines, simple controls, and low vibration reduce mistakes during long shifts. Plan transport, fuel storage, daily inspections, and routine servicing before delivery. The first work estimate is rarely perfect. Soil can be wetter, access tighter, and spoil heavier than expected. Recheck the plan after a small test dig. That modest pause can prevent an expensive mismatch.
How to Choose the Best Mini Excavator for Your Needs?
Defining your work requirements starts with matching the machine’s operating-weight class to the digging depth your project requires.
The chart shows representative maximum digging-depth ranges commonly associated with mini excavators from micro to larger compact classes. Actual performance varies with boom configuration, arm length, bucket selection, and ground conditions.
Comparing Excavator Sizes, Weights, and Digging Capacities
How to Choose the Best Mini Excavator for Your Needs?
Mini excavator size affects transport, stability, access, and digging performance. A 1–2 tonne machine can enter narrow gates and work beside garden walls. A 3–6 tonne model offers greater lift capacity and deeper reach. Larger 6–10 tonne units usually provide stronger breakout force, but they need more space and firmer ground. The 2024 EquipmentWatch Rental Rate Blue Book lists similar operating-weight classes for rental evaluation, although exact classifications vary by region.
Digging depth matters more than advertised horsepower. Typical compact machines reach about 2.5 to 4.5 metres, while larger mini excavators can exceed 5 metres. Check the digging chart, not only the engine rating. ISO 6015:2016 defines testing methods for hydraulic excavator lift capacity, helping buyers compare rated loads more reliably. Still, soil, bucket size, and boom position change real results. Wet clay can defeat a specification sheet quickly.
Transport weight deserves equal attention. The U.S. Department of Transportation commonly limits trailer combinations by axle and gross weight rules, so confirm local requirements before purchase. I have seen contractors choose a heavier excavator for one deep trench, then struggle with every delivery afterward. That choice can be expensive. Measure the access route, estimate spoil volume, and compare bucket capacity with the daily workload. A smaller machine may take longer, yet cause less ground damage and require simpler transport.
How to Choose the Best Mini Excavator for Your Needs? - Comparing Excavator Sizes, Weights, and Digging Capacities
| Excavator Class |
Typical Operating Weight |
Typical Engine Power |
Maximum Digging Depth |
Typical Bucket Capacity |
Approximate Overall Width |
Best Suited For |
| Micro Excavator |
0.8–1.8 metric tons |
10–20 hp |
1.7–2.4 m |
0.02–0.06 m³ |
0.75–1.35 m |
Backyard work, narrow gates, landscaping, irrigation, and light utility repairs |
| Mini Excavator |
1.8–3.5 metric tons |
15–30 hp |
2.2–3.2 m |
0.04–0.12 m³ |
1.35–1.65 m |
Residential foundations, drainage trenches, driveways, and general landscaping |
| Mid-Size Mini Excavator |
3.5–6 metric tons |
25–50 hp |
3.0–4.0 m |
0.10–0.25 m³ |
1.65–2.00 m |
Commercial site preparation, deeper trenches, road maintenance, and heavier material handling |
| Large Mini Excavator |
6–10 metric tons |
45–75 hp |
3.5–4.6 m |
0.20–0.45 m³ |
2.00–2.35 m |
Heavy excavation, utility construction, retaining walls, and demanding site work |
Key Selection Factors
| Selection Factor |
What to Check |
Practical Recommendation |
| Access Width |
Measure gates, passages, trailer ramps, and the narrowest point on the site. |
Choose a machine narrower than the tightest access point, allowing clearance for safe movement. |
| Required Digging Depth |
Compare the required trench or foundation depth with the machine’s maximum digging depth. |
Select additional reach beyond the required depth to improve positioning and working flexibility. |
| Ground Conditions |
Consider soil density, slope, mud, loose gravel, and available working space. |
Use a heavier class for hard or unstable ground, while avoiding unnecessary ground pressure on finished surfaces. |
| Lifting Requirements |
Check the weight of pipes, concrete sections, rocks, and other loads to be lifted. |
Review the rated lift capacity at the required reach; digging capacity does not equal lifting capacity. |
| Transportation |
Include the excavator, attachments, trailer, and towing vehicle in the total transport weight. |
Keep the combined load within the legal towing and trailer limits. |
| Attachments |
Identify buckets, hydraulic breakers, augers, thumbs, grading blades, or compactors needed. |
Confirm hydraulic flow, attachment weight, mounting compatibility, and auxiliary-control requirements. |
Note: The specifications above are typical industry ranges for comparison. Actual performance varies by machine configuration, boom and arm length, counterweight, bucket type, track width, hydraulic settings, and operating conditions. Always confirm the manufacturer’s specification sheet before purchase or rental.
Checking Site Access, Transport Needs, and Ground Conditions
How to Choose the Best Mini Excavator for Your Needs?
Site access should guide your excavator choice before digging begins. Measure the narrowest gate, path, and turning area. Record overhead branches, door frames, slopes, and nearby walls. A machine may fit the entrance but fail to turn safely inside. That mistake can delay work and damage surfaces. Check the machine’s width, tail swing, operating height, and digging reach against your measurements. Leave extra clearance for uneven ground and operator movement. Small details matter.
Transport needs also affect the right machine. Confirm the trailer’s rated capacity, loading angle, and available tie-down points. Include the excavator, attachments, fuel, and essential tools in your weight calculation. The lightest model is not always the most practical. It may lack enough digging force for compacted soil. A heavier model may perform better but create difficult transport requirements. I still recheck these figures because site plans can be incomplete.
Tips: Walk the entire route before hiring. Test soft ground with a boot or probe. Look for hidden voids near old drains. Ask a qualified equipment supplier to review your measurements and ground conditions. Clay, gravel, wet soil, and rocky ground each demand different bucket choices and working methods. A neat plan can still be wrong. Reassess after rain, especially near slopes and trenches. Use ground protection when the access route feels unstable or easily damaged.
Balancing Purchase Price, Ownership Costs, and Long-Term Value
How to Choose the Best Mini Excavator for Your Needs?
Choosing a mini excavator starts with the work, not the brochure. Digging narrow utility trenches requires different priorities from landscaping or demolition. Measure access points, soil conditions, lifting needs, and expected weekly hours. A lower purchase price may look attractive, but weak performance can increase fuel use and downtime. Think beyond today.
From jobsite experience, ownership costs often decide whether a machine remains profitable. Check fuel consumption, scheduled maintenance, hydraulic service, track replacement, attachment prices, delivery, and storage. Ask for maintenance records and confirm that common parts are readily available. A cold-start inspection can reveal smoke, slow hydraulics, or unusual engine noise. Track every hour.
I once focused too heavily on the sticker price. The machine looked affordable, but frequent service interruptions damaged the schedule. That mistake changed how I compare equipment. I now calculate cost per operating hour, including repairs and lost production. Long-term value also depends on operator comfort, stable resale demand, and support from qualified technicians. Inspect the boom, pins, bucket linkage, undercarriage, and safety controls before purchase. Small details matter. A slightly higher initial investment can make sense when it reduces downtime and supports several types of work. Still, projections are imperfect. Actual costs depend on soil, workload, maintenance discipline, and operator habits. Use realistic estimates, not optimistic promises.